Wallpaper adds a touch of elegance and personality to Dubai homes, turning plain walls into stylish design features. But Dubai’s harsh climate—marked by high humidity, rapid temperature shifts, and constant air conditioning—can weaken wallpaper adhesives over time. The result? Peeling corners, bubbling surfaces, and edges that refuse to stay in place.
If you’re facing these frustrating issues, you’re not alone. Many homeowners in Dubai struggle with wallpaper maintenance due to environmental wear and tear. In this guide, we’ll break down the key reasons why wallpaper often fails in UAE homes, show you effective repair methods, and share expert tips on how to protect your wallpaper from future climate-related damage. Whether you’re dealing with minor fixes or planning long-term prevention, this article has everything you need to restore and preserve your walls.
Understanding the Dubai Wallpaper Challenge: Humidity and Heat
To effectively combat wallpaper issues in the UAE, it’s crucial to first understand the specific environmental factors at play. The intense heat and persistent high humidity in Dubai significantly accelerate the breakdown of standard wallpaper adhesives over time, making proper material selection and diligent repair techniques essential for maintaining a polished and beautiful home interior.
Here’s a quick overview of common wallpaper problems in Dubai and their underlying causes:
| Problem | Cause |
| Peeling at Seams | High humidity, weak or poor adhesive |
| Air Bubbles | Improper smoothing during application |
| Torn Wallpaper | Physical damage, age |
| Curling Corners | Heat, weak paste |
| Wallpaper Won’t Stick | Dusty/damp walls, insufficient adhesive |
Essential Tools and Materials for Wallpaper Repair in Dubai
Equipping yourself with the right tools is the first step towards a successful and lasting wallpaper repair in Dubai’s challenging climate. These items are readily available at hardware stores across Dubai. Click here for better wallpaper fixing services.
- Wallpaper adhesive or glue: Opt for mold/moisture-resistant and heavy-duty options suitable for humid climates.
- Seam roller: Essential for pressing down edges and seams firmly.
- Utility knife or craft blade: For clean cuts and patching.
- Wallpaper brush or small brush: For applying adhesive.
- Sponge and warm water: For wiping off excess glue.
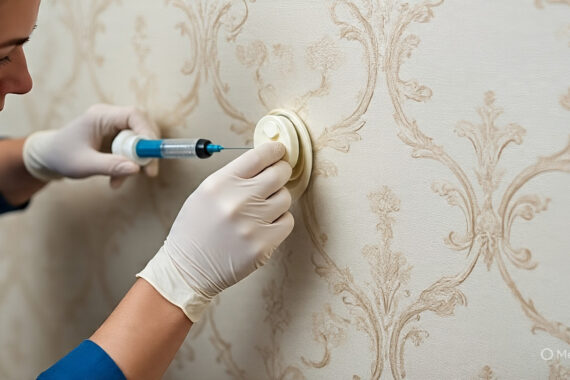
- Adhesive syringe: Ideal for injecting glue into bubbles or small peeling areas.
- Wallpaper smoother or flat roller: For eliminating air bubbles and ensuring even application.
- Wallpaper patches: From leftover rolls for seamless repairs.
- Wallpaper primer: (if needed) to improve adhesion on prepared walls.
- Steamer or wallpaper removal solution: For extensive removals.
- Putty or plaster: for repairing damaged walls underneath.
- Sandpaper: For smoothing wall repairs.
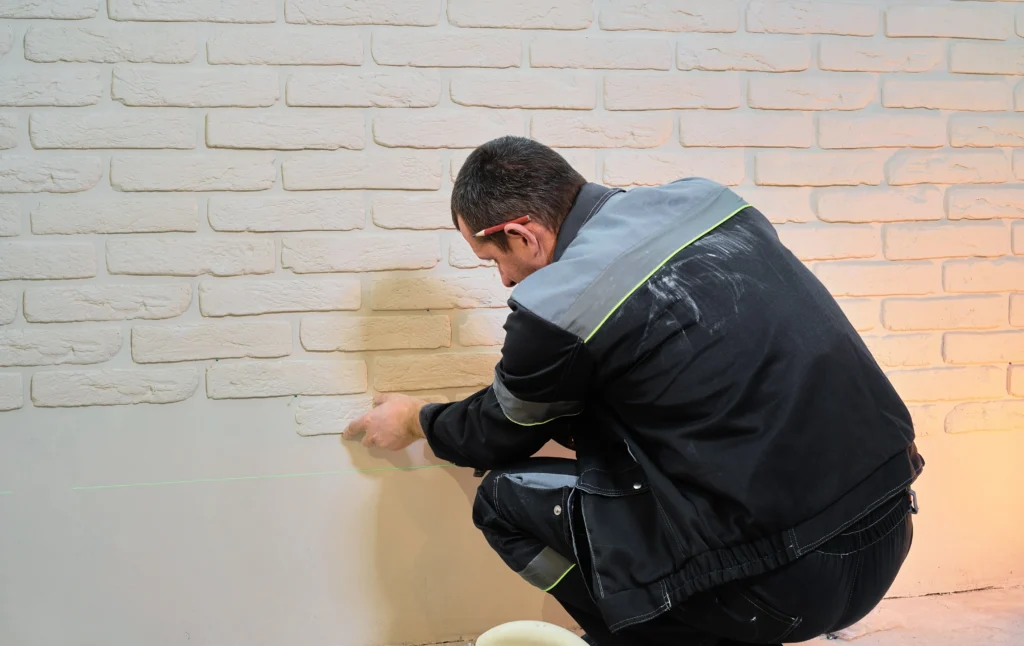
- Plumb line or spirit level: For accurate installation, if re-applying large sections.
- Measuring tape, pencil, and scissors/paper cutter.
How to Re-Glue Peeling Wallpaper in Dubai’s Humid Climate
Peeling wallpaper, especially at the seams or corners, is a prevalent issue in Dubai homes. Fortunately, it’s often a manageable DIY fix.
Step-by-Step Re-Gluing Process:
- Gently Lift the Edge: Carefully pull back the peeling wallpaper edge to expose the wall beneath. Avoid tearing it.
- Clean the Surface: Ensure the area behind the wallpaper is dry and free of dust, old adhesive residue, or any grime. A lightly damp cloth can be used, but allow the wall to dry completely.
- Apply Adhesive: Using a small brush or an adhesive syringe (for precision in bubbles or fine seams), apply a thin, even layer of your chosen wallpaper adhesive to the exposed wall or the back of the wallpaper. For larger sections, apply directly to the wall.
- Press and Secure: Carefully press the wallpaper back onto the wall.
- Smooth with a Seam Roller: Use a seam roller to firmly flatten the re-glued section, working from the center outwards to eliminate any trapped air bubbles and ensure strong adhesion. For stubborn bubbles, prick a tiny hole with a needle, inject a small amount of glue, and then smooth.
- Wipe Excess: Immediately wipe off any excess glue with a damp sponge before it dries to prevent stains.
- Always hire an expert from Dubai to fix the wallpaper. It saves your cost and works with efficiency.
Addressing Damaged Walls Under Wallpaper:
Sometimes, the wallpaper issue stems from the wall itself. Cracks, dampness, or mold beneath the surface will prevent proper adhesion.
- Remove Damaged Section: Carefully scrape off the wallpaper in the affected area.
- Repair the Wall: Use appropriate putty or plaster to repair cracks or imperfections.
- Allow to Dry: Let the repaired area dry completely according to product instructions.
- Sand and Clean: Sand the surface smooth and clean off any dust.
- Prime the Wall: Apply a suitable wallpaper primer to the repaired section. This creates an ideal surface for the new adhesive.
- Reapply Wallpaper: Once the primer is dry, reapply the wallpaper as described above, or patch the area if necessary.
How to Fix Wallpaper Damage on Walls (Patching):
For tears or localized damage, you don’t always need to redo an entire strip. “Beyond just repairs, finding durable and stylish wallpaper is key for Dubai’s climate. You can explore a vast range of high-quality options from experts like Allure Wallpaper that are designed to withstand local conditions.”
- Cut a patch from leftover wallpaper (ideally from the same batch) slightly larger than the damaged area.
- Line up the pattern of the patch with the wallpaper on the wall.
- Place the patch over the damaged spot and use a sharp utility knife to cut through both the patch and the old wallpaper simultaneously.
- Remove the damaged layer of wallpaper.
- Apply wallpaper adhesive to the wall where the patch will go, or to the back of the patch.
- Carefully align and press the new patch into place, smoothing out any air bubbles.
- Wipe away excess adhesive.
Best Adhesives for Wallpaper Repair in Dubai
Choosing the right adhesive is paramount for long-lasting wallpaper in Dubai’s climate. Standard glues often fail under high heat and humidity.
Key Adhesive Characteristics for Dubai:
- Humidity/Moisture Resistant: This is non-negotiable. Look for adhesives specifically designed to withstand damp conditions.
- Heavy-Duty/Strong Bond: Dubai’s climate demands a robust adhesive that can maintain its grip despite environmental stress.
- Anti-Mold/Mildew Properties: Given the humidity, an adhesive with fungicidal additives is a smart choice to prevent mold growth behind your wallpaper.
Types of Adhesives and Their Suitability:
- Pre-mixed Polymer-Based Adhesives: These are often the best choice for Dubai. They offer excellent strength and flexibility and are typically resistant to moisture.
- Heavy-Duty Vinyl Adhesives: Good for heavier wallpapers and provide a strong bond.
- Border Adhesives: Specialized, often thicker, glues for securing wallpaper borders.
Understanding Wallpaper Installation Methods (Relevant for Repair):
While repairs often involve specific glues, understanding original installation methods also helps in choosing the right repair adhesive or diagnosing the cause of failure.
- Peel & Stick (Self-Adhesive): Designed for temporary or DIY applications, they have a pre-applied adhesive. Repairs might involve edge re-gluing if the original adhesive weakens.
- Paste Paper Method: Adhesive is applied to the back of the wallpaper. Requires a strong, reliable paste.
- Pre-Pasted Wallpaper Method: Wallpaper comes with dry adhesive on the back, activated by soaking in water. Repairs need a separate, suitable liquid adhesive.
- Paste Wall Method: Adhesive is applied directly to the wall. Ideal for non-woven wallpapers and often less messy during initial installation. This method is often preferred in areas with fluctuating humidity, as the wall is directly prepared.
- Overlap & Double-Cut Method: This technique is often used for a seamless finish, especially with patterned papers. It involves overlapping two strips and then cutting through both layers with a sharp knife to create a perfect join. This method requires a strong underlying adhesive to ensure the overlapped edges don’t lift.
Expert Tip: Always test a small, inconspicuous area before widespread application of a new adhesive to ensure compatibility and desired results. Avoid using regular white glue; it’s not formulated for wallpaper and won’t hold up.
Preventing Wallpaper Seams from Lifting in Dubai Villas
Prevention is always better than a cure, especially when it comes to maintaining wallpaper in Dubai’s unique climate. Smart choices during installation and regular maintenance can significantly extend the life of your wallpaper.
Dubai-Proof Wallpapering Tips for Longevity:
- Choose the Right Wallpaper Material:
- Vinyl or Moisture-Resistant Wallpaper: These types are engineered to withstand humidity and temperature fluctuations far better than traditional paper-based wallpapers. They are often washable and more durable, making them ideal for Dubai’s climate and often the best wallpaper for humid climates.
- Thorough Wall Preparation:
- Clean Walls: Always ensure walls are impeccably clean, dry, and smooth before any application. Dust, grease, or old adhesive residue will compromise adhesion.
- Prime Your Walls: Applying a high-quality wallpaper primer is crucial. It creates a consistent, receptive surface that improves glue adhesion, prevents absorption of adhesive, and helps prevent mold. This is especially important in humid environments.
- Address Imperfections: If walls have flaws, use lining paper or spackle and sand thoroughly to create a perfectly smooth base.
- Strategic Installation:
- Avoid Direct Sunlight: Do not apply wallpaper in direct sunlight or during the hottest part of the day. Extreme heat can cause bubbling and discoloration.
- Optimal Temperature & Humidity: Aim for moderate temperatures and lower humidity levels during installation. Ensure good ventilation.
- Precise Cutting: Measure and cut wallpaper strips accurately to fit. For tricky areas like slanted walls or corners, measure meticulously, cut to the angle precisely, and use extra adhesive at edges. Start from the top and work downwards, letting gravity assist.
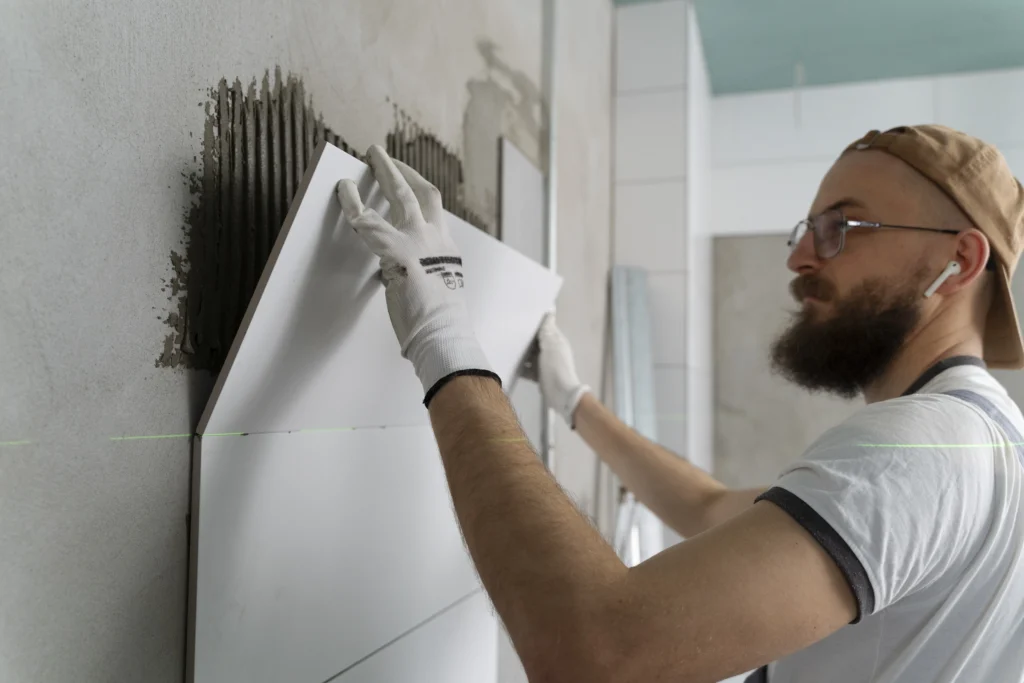
- Smooth Application: Use a wallpaper smoother or flat roller to eliminate all air bubbles from the center outwards as you apply.
- Seam Rolling: Go over all seams with a seam roller immediately after application to ensure they are firmly pressed and sealed.
- Don’t Overwet: When dampening wallpaper or wiping excess glue, use a damp (not soaking) sponge.
- Consider AC Airflow: Position AC units or vents so that direct, strong airflow doesn’t constantly hit wallpaper seams or edges. Consistent, localized blasts of dry air can dry out adhesives prematurely.
- Post-Installation Checks: Recheck all seams and edges after 24 hours of drying. This allows you to spot and fix any weak spots early before they become larger problems.
- Regular Maintenance:
- Gentle Cleaning: Regularly dust and gently clean your wallpaper with a soft, damp cloth.
- Control Moisture: Ensure good ventilation in high-humidity areas like kitchens and bathrooms to control moisture levels that can impact wallpaper.
When Repair Isn’t Enough: Wallpaper Removal
If your wallpaper is beyond repair or you simply want a fresh look, removal is the next step.
How to Remove Wallpaper in Dubai’s Humid Climate:
- Score the Surface: Use a wallpaper scorer to perforate the surface of the wallpaper. This allows removal solutions to penetrate.
- Apply Solution: Spray with a specialized wallpaper removal solution or a vinegar-water mix. A steamer can also be highly effective.
- Let it Soak: Allow the solution to soak in for 10-15 minutes, or as directed by the product. This softens the adhesive.
- Peel and Scrape: Gently peel off the wallpaper with a scraper or putty knife. Avoid dry scraping, as it can damage your walls.
- Clean and Prepare: Once all wallpaper is removed, clean the wall thoroughly to remove any adhesive residue and let it dry completely before applying new wallpaper or paint.
Frequently Asked Questions (FAQs)
Q1: What can I use to fix wallpaper that’s bubbling?
For bubbles, use a fine needle to poke a tiny hole, then use an adhesive syringe to inject a small amount of wallpaper adhesive into the bubble. Gently press and smooth the area with a wallpaper smoother or a clean roller to spread the glue and remove the air. Wipe off any excess.
Q2: How do I fix wallpaper that is peeling at the corners?
Gently lift the peeling corner. Apply a small amount of heavy-duty wallpaper adhesive to the back of the wallpaper and the wall beneath. Press the corner firmly back into place and use a seam roller to ensure it’s securely adhered. Wipe away any extra glue.
Q3: Can I use regular white glue instead of wallpaper adhesive?
No, it’s highly recommended to avoid using regular white glue (like school glue or craft glue). These glues are not formulated to withstand the weight of wallpaper or the environmental conditions in Dubai (heat, humidity, moisture) and will likely fail quickly, leading to more damage. Always use a dedicated wallpaper adhesive, preferably one that’s heavy-duty and moisture-resistant.
Q4: How to fix wallpaper on a wall in Dubai heat?
The key is to use humidity-resistant and heavy-duty wallpaper adhesives. Work in a well-ventilated area, ideally during cooler parts of the day or with the AC on. Ensure the wall is completely dry and clean before applying adhesive. Avoid direct sunlight during the application process to prevent premature drying or bubbling.
Q5: How to put wallpaper on slanted walls without air pockets?
For slanted walls, measure precisely and cut the wallpaper strip to fit the angle. Apply adhesive directly to the wall if using the paste-the-wall method. Start at the top and carefully align the strip, letting gravity assist. Use a wallpaper smoother to press from the center outwards, ensuring all air is pushed out towards the edges, minimizing air pockets. Extra adhesive can be beneficial along the angled edges.
Final Thoughts
In conclusion, while Dubai’s unique climate presents distinct challenges for wallpaper, effective solutions are readily available. By understanding the causes of common issues, utilizing appropriate high-quality materials, and applying diligent repair and prevention techniques, you can ensure your home’s wall coverings remain vibrant and secure. Empowering yourself with these methods means enjoying flawless walls for years to come.